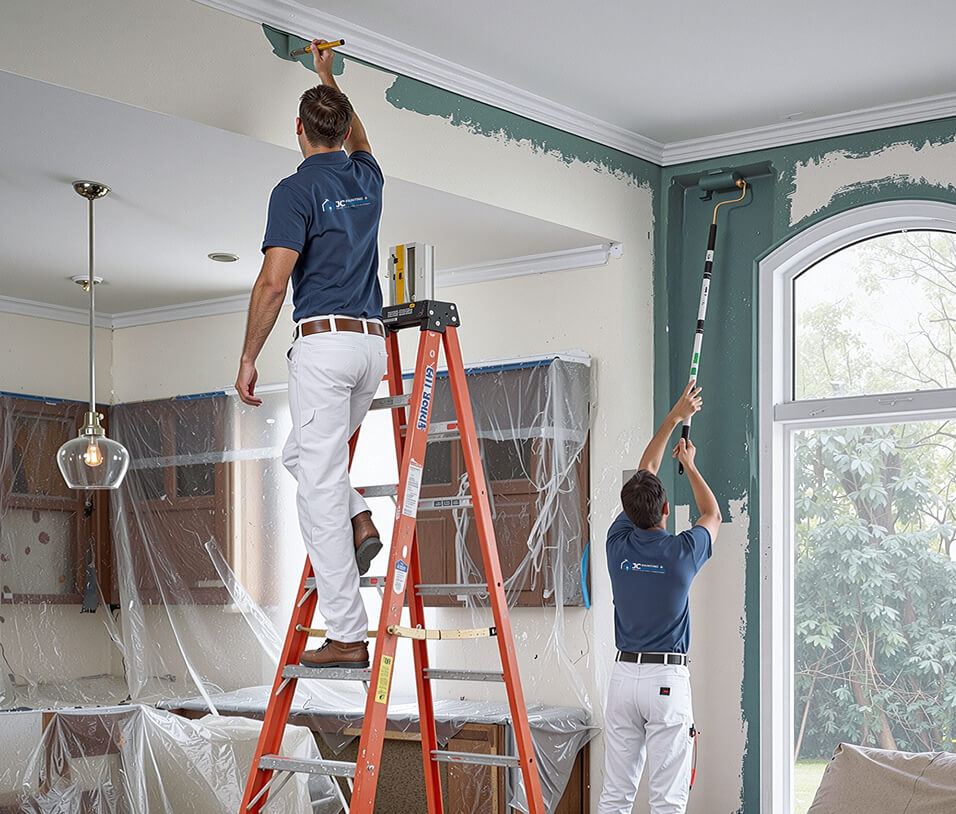
Transforming the interior of a home involves far more than simply opening a paint can and applying a few coats to the wall. A true full-service residential interior painting project is an end-to-end craft—a comprehensive process designed to deliver flawless results, protect your property, and ensure long-lasting durability.
When you hire a professional, full-service painting team, you are paying for expertise, rigorous preparation, high-quality materials, and systematic execution. Here is a detailed, step-by-step breakdown of everything included in a complete interior painting service.
1. Initial Consultation and Project Planning
Before any paint touches a wall, a successful project begins with detailed planning and clear expectations.
On-Site Assessment and Estimation
-
Detailed Property Walkthrough: A comprehensive inspection of the rooms, ceiling heights, wall surfaces, trim, and doors to assess the scope of work.
-
Surface Evaluation: Identifying drywall defects, moisture damage, peeling paint, or structural settling issues that require repair before painting.
-
Transparent Estimate: Providing a detailed written proposal that breaks down labor, material costs, surface preparation steps, and the scope of work room by room.
Color and Finish Consultation
-
Color Selection Assistance: Guidance on choosing complementary color palettes, accent walls, and popular interior color trends.
-
Sheen and Finish Recommendations: Selecting the appropriate sheen for each space (e.g., flat or matte for ceilings, eggshell or satin for living areas, and semi-gloss or high-gloss for trim, doors, and high-moisture areas like kitchens and bathrooms).
-
Sample Testing: Applying physical paint samples to walls to observe how different lighting conditions affect the color throughout the day.
2. Total Workspace Protection and Setup
A core standard of full-service painting is ensuring your home, furniture, and belongings remain completely clean and protected throughout the job.
Furniture and Flooring Safeguards
-
Furniture Relocation: Moving heavy furniture pieces to the center of the room and covering them securely with clean plastic sheeting.
-
Flooring Protection: Covering hardwood, carpet, tile, and vinyl with heavy-duty drop cloths, builder paper, or plastic film taped securely along baseboards.
-
Fixture Shielding: Wrapping ceiling fans, light fixtures, switch plates, outlet covers, and door hardware or removing them for safety and precision.
Containment and Ventilation
-
Dust Containment Seals: Installing plastic dust barriers over doorways to isolate the work zone and protect neighboring rooms from sanding dust.
-
Air Circulation Setup: Managing ventilation using air scrubbers or exhaust systems to minimize fumes, VOC emissions, and airborne particles.
3. Comprehensive Surface Preparation
Preparation accounts for up to 70% of the effort in a high-quality paint job. Skipping prep leads to premature peeling, uneven textures, and poor adhesion.
Wall and Surface Cleaning
-
Degreasing and Washing: Removing dirt, grease, hand oils, and cobwebs from walls and trim, particularly in kitchens and high-traffic hallways.
-
Mildew Treatment: Cleaning mold or mildew spots in humid areas using specialized solutions to ensure the spores do not bleed through new paint.
Patching and Drywall Repair
-
Filling Holes and Cracks: Filling nail holes, screw pops, stress cracks, and minor gouges with high-grade spackle or joint compound.
-
Drywall Joint Repairs: Taping and mudding larger drywall damage or water-damaged sections to blend seamlessly with the surrounding wall.
-
Sanding to Flush Finish: Precision hand or dustless mechanical sanding over patched areas to ensure an imperceptible transition.
Surface Smoothness and Texture Matching
-
Removing Loose Paint: Scraping away flaking or peeling paint layers from older surfaces.
-
Texture Blending: Matching existing wall textures (such as orange peel, knock-down, or smooth finish) over repaired areas so patched spots do not stand out.
-
Scuff Sanding Glossy Surfaces: Sanding pre-existing semi-gloss or oil-based paints to create a "profile" (roughness) that allows new paint to adhere firmly.
Caulking and Sealing
-
Sealing Trim Gaps: Applying paintable acrylic latex caulk along the joints of baseboards, crown molding, door casings, and window trim to eliminate gaps and draft lines.
-
Stain Blocking: Applying specialized stain-blocking primers over water stains, smoke residue, marker marks, or wood tannins to prevent bleed-through.
4. Priming Strategy
Priming creates a uniform base, seals porous surfaces, improves adhesion, and ensures true color rendition.
Types of Primers Applied
-
Drywall Primers/PVA: Applied to raw drywall or fresh patches to equalize porosity.
-
Bonding Primers: Applied over tricky or glossy surfaces (such as laminate, metal, or glossy paint) to ensure adhesion.
-
Stain-Blocking Primers: Shellac- or oil-based primers used on severe smoke, soot, or water damage.
5. Professional Paint Application
With prep complete and primers cured, the actual painting phase begins using professional tools and techniques.
Core Areas Covered in Full-Service Interior Painting
-
Ceilings: Painted first using specialized non-glare flat ceiling paint to hide minor imperfections and optimize light reflection.
-
Walls: Application of specified finish coats using premium brushes, rollers, or airless sprayers depending on the room layout and surface texture.
-
Trim and Moldings: Precision hand-painting of baseboards, crown molding, chair rails, picture rails, and window sills.
-
Doors and Frames: Painting interior doors (panel, flush, or French doors) and casing with durable, washable enamels.
-
Cabinets and Built-ins: (Optional/Add-on) Refinishing or repainting built-in bookshelves, entertainment centers, and kitchen cabinetry.
Application Standards
-
Two Full Coats Standard: Applying a minimum of two full coats of premium paint to achieve rich color depth, uniform sheen, and maximum durability.
-
Straight, Clean Cut-In Lines: Hand-crafting razor-sharp edge lines where walls meet ceilings, trim, and adjacent walls without the slop or bleeding associated with DIY work.
-
Drying Time Respect: Allowing adequate cure and dry times between coats according to manufacturer specifications.
6. Daily Clean-Up and Final Inspection
A full-service contractor treats your living space with respect from start to finish.
Daily and Final Worksite Clean-Up
-
Trash Removal: Removing all masking tape, plastic film, paper coverings, and trash daily.
-
Reinstalling Hardware: Re-mounting switch plates, outlet covers, light fixtures, and hardware removed prior to painting.
-
Furniture Restoration: Returning furniture to its original layout and removing floor coverings.
-
Floor Cleaning: Vacuuming carpets and sweeping/mopping hard surface flooring around the work area.
Final Quality Assurance Walkthrough
-
Touch-Up Check: Using high-lumen work lights to inspect every surface for holidays (missed spots), drips, runs, or sheen inconsistencies.
-
Customer Walkthrough: Conducting a comprehensive walkthrough with the homeowner to review every room together.
-
Touch-Up Kit Provided: Leaving labeled leftover paint containers for each color and finish, along with small brushes for future minor home maintenance.
-
Warranty Documentation: Providing official written warranty details covering labor and materials against peeling, blistering, or chipping.
Summary Checklist: Full-Service Interior Painting
| Service Phase | Key Deliverables |
| Planning | Color consultation, estimate, sheen selection, sample testing |
| Protection | Floor covering, furniture wrapping, dust barriers, fixture masking |
| Preparation | Washing, scraping, crack patching, drywall repair, caulking, sanding |
| Priming | PVA primers, stain blockers, bonding primers |
| Painting | Ceilings, walls, trim, doors, casings (2 full coats minimum) |
| Completion | Hardware reinstallation, deep cleanup, touch-up kit, final inspection |